Category Archives for Fruity
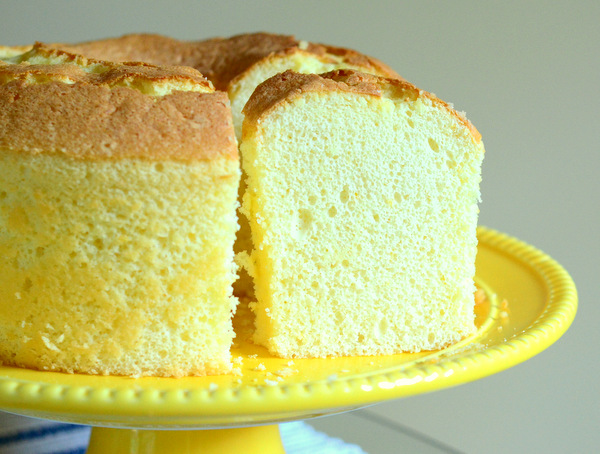
Lemon Chiffon Coconut Cake

Ingredients
- 14 large egg whites
- ½ tsp cream of tartar
- ½ cup unsalted butter, melted
- ½ cup coconut milk
- 7 egg yolks
- ⅓ cup xylitol
- 3 tbsp erythritol
- Pinch pure powdered stevia
- 2 tsp lemon zest
- 1 tsp vanilla
- ½ tsp salt
- 1 cup coconut flour, sifted
- 1 tsp baking powder
Instructions
1. Preheat oven to 325°F. Prepare 3 mini Bundt pans or one large Bundt pan with oil. Set aside.
2. Combine the egg whites and cream of tartar in a large bowl. Use a handheld or standing mixer to beat the egg whites until stiff peaks form. Set aside.
3. In a medium bowl whisk together the melted butter, coconut milk, egg yolks, sweeteners, lemon zest, vanilla and salt. Once fully combined add the coconut flour and baking powder. Blend quickly (the longer it sits the more likely it will become very thick).
4. Add ⅓ of the egg whites to the coconut mixture and stir to combine. Gently add another ⅓ of the eggs to the mixture and using a spatula fold into the batter. Repeat for the remaining egg whites. Do not overmix, try to keep as much air in the batter as possible.
5. Fill each pan then bake for 40-45 minutes until fully set, golden on top and it begins to pull away from the sides of the pan. Allow to cool for 15 minutes then invert and continue to cool. The cakes should fall from the pan but some gentle nudging may be necessary. NOTE: a large Bundt pan will require 65-75 minutes to completely bake.
Net Carbs : 3.1g
SugarOH: 8.3g
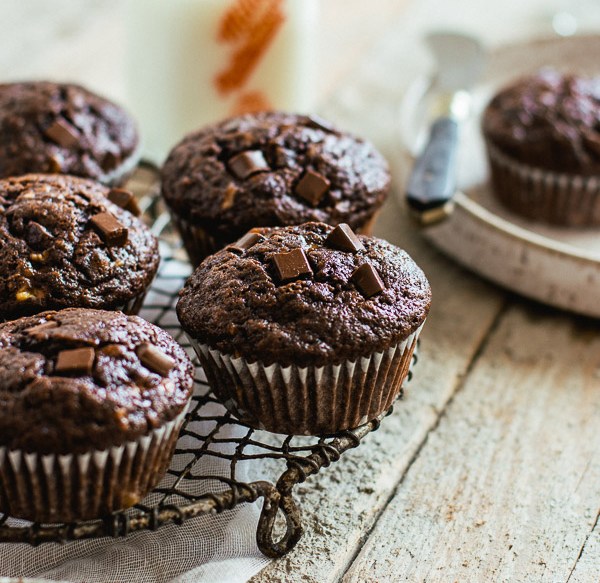
Cranberry Collagen Yummies

Ingredients
- 4 ½ oz fresh or frozen cranberries (about 1 ¼ cup)
- 1 cup water + 2 tbsp, divided
- ½ tbsp lemon juice
- 1 tbsp orange zest
- 3 tbsp xylitol
- 1 pinch pure stevia (20 drops of liquid)
- 1 tsp cinnamon
- ½ tsp ginger
- ⅛ tsp cloves
- 4 tbsp gelatin
- 2 tsp vanilla
Instructions
- Place cranberries, 2 tbsp of water, lemon juice, orange zest, xylitol, stevia, cinnamon, ginger and cloves in a sauce pan over medium heat and bring to a boil. Cook for 10-15 minutes stirring occasionally until all the cranberries pop. Remove from heat and set aside.
- In a small with the remaining 1 cup of water sprinkle the gelatin over the top while whisking until it does not have any additional lumps. Let it sit for 2 minutes to bloom or soften.
- Transfer the cranberry mixture to a blender and blend until smooth.
- Once the gelatin has softened add it to the warm pan used for the cranberries and heat over very low heat while stirring until the gelatin has melted and becomes clear. Add the cranberry mixture and vanilla. Taste to adjust sweetness, if desired add additional stevia to your taste. To add additional flavor add ½ drop* each of cinnamon, clove and ginger essential oils and 3-4 drops orange essential oil. *Use a toothpick to add.
- Pour into individual 1 tbsp silicon molds or into an 8x8 inch pan lined with plastic wrap. Place in refrigerator for 2 hours to set up then remove from mold or cut into 34 pieces and store in an air tight container. Store in the refrigerator for up to 1 week but do not freeze.
Notes
Net Carbs = 0.4g
SugarOH = 1.1g

Pumpkin Pie Granola

Ingredients
Granola
- ¼ cup Spiced Pumpkin Butter (or pumpkin puree)
- 2 tbsp coconut oil, melted
- 1 egg white
- 1 tsp vanilla
- 4 tbsp Lakanto® sweetener https://www.lakanto.com/
- 1 Pinch pure stevia powder
- ½ tsp salt
- ½ tsp chili powder
- 1 ½ tsp ground cinnamon
- ½ tsp ground ginger
- ¼ tsp ground allspice
- ⅛ tsp ground cloves
- ¼ cup flax seeds
- 1 cup flaked unsweetened coconut
- 1 cup pecans, chopped
- ½ cup pumpkin seeds
Instructions
- Preheat oven to 325°F. Prepare a sheet pan with parchment paper or a silicon mat.
- In a medium bowl whisk together the Spiced Pumpkin Butter, coconut oil, eggy white and vanilla. Add the sweeteners salt and spices and whisk until thoroughly combined.
- Place the flax seeds in a food processor and pulse a few times. Then add the coconut, pecans, and pumpkins seeds and pumpkin butter mixture. Pulse 5-7 times until completely blended and mixture is medium coarse in texture. If you prefer a chunkier granola pulse less.
- Spread mixture evenly on the parchment paper or silicon mat and bake for 15 minutes. Stir using a spatula, flipping over larger pieces and continue to bake for another 10-15 minutes until fragrant and crisp. Remove from the oven and allow to cool to room temperature. If you find your mixture is not quite dry. Heat oven again to 300°F then turn off and set the granola back in the oven and close the door allowing the granola to continue to dry out but at a much lower temperature as the oven cools. Makes 4 cups, each serving is ½ cup.
Notes
Net Carbs: 3.5g
SugarOH: 6g
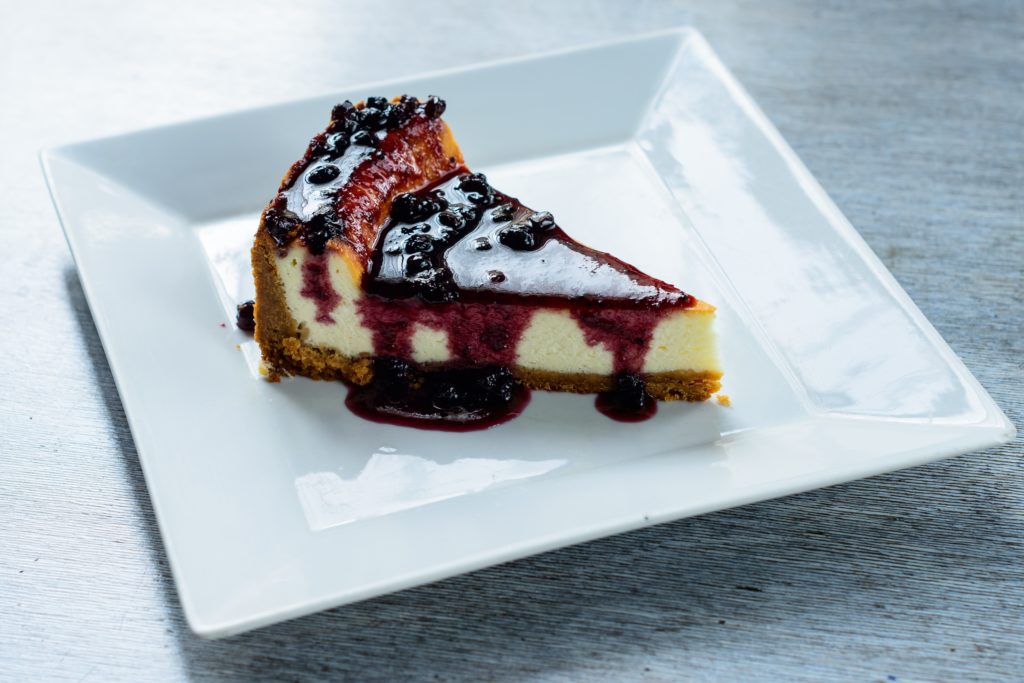
Probiotic NY-Style Non-Dairy Cheesecake

Ingredients
Cheesecake Filling
- 2 cups raw cashews
- 2 probiotic capsules (or ¼ cup unsweetened coconut yogurt or whey from milk or coconut kefir)
- 2 tbsp coconut oil
- 1 lemon (zested and juiced, 2 tsp zest and 2 tbsp juice)
- 2 tbsp xylitol, powdered
- 2 pinches pure powdered stevia
- 2 tbsp unsweetened coconut milk or water
- 1 tsp gelatin
- 2-3 drops lemon essential oil (optional)
Cheesecake Topping
- 14oz can of unsweetened coconut milk or cream
- 2 probiotic capsules (or ¼ cup unsweetened coconut yogurt or whey from milk or coconut kefir)
- 2 tbps xylitol, powdered
- 1 pinch pure powdered stevia
- 2 tsp vanilla extract
- 2 tbsp unsweetened coconut milk or water
- 1 tsp gelatin
Instructions
- Filling:
- Soak nuts overnight or for at least 8 hours and as much as 24 hours in a large bowl with filtered water. Drain and place in a blender with the coconut oil.
- Blend until the cashews become a very fine paste adding water a tablespoon at a time if necessary to create a very smooth and thick mixture.
- Break open the probiotic capsules (or add the other options) and add to the nut mixture. Blend for 1-3 pulses until combined.
- Pour mixture into a bowl, cover loosely with a clean kitchen towel or clean paper towel and place in a dark area in your kitchen (I place mine in a cabinet so it won’t be disturbed and won’t be affected by light). Allow the probiotic cashew mixture to sit undisturbed for 24-48 hours. Test after 24 hours to see if it is sour enough for your taste. Place in the refrigerator in a container with a tight fitting lid.
- After both the filling and topping (below) have been cultured (either before or after refrigeration) stir the lemon zest, lemon juice, xylitol and stevia (add lemon essential oil now too if using) into the cheesecake filling. Set aside.
- Place the coconut milk into a small microwavable bowl and sprinkle the gelatin over the top; allow to rehydrate for 2-3 minutes then microwave for 10-15 seconds until all the gelatin has melted and appears clear (do not boil). Add 2-3 tbsp of the cheesecake filling to the bowl of gelatin and stir until blended then blend that into the rest of the filling. Set aside.
- Topping
- Heat the coconut milk to 115°F, remove from heat and set aside to cool down to 100°F.
- Once the milk has reached 100°F, break open the probiotic capsules and sprinkle them onto the warm milk. Whisk until uniform. Pour mixture into the container of your yogurt maker or pour into a container with a cover (not airtight) and set in a warm location in your kitchen (an oven with the oven light on works fine) for 18-24 hours.
- After the coconut milk has cultured, place into a container and blend in the xylitol, stevia and vanilla until smooth. Set aside.
- Place the coconut milk into a small microwavable bowl and sprinkle the gelatin over the top; allow to rehydrate for 2-3 minutes then microwave for 10-15 seconds until all the gelatin has melted and appears clear (do not boil). Add 2-3 tbsp of the cheesecake topping to the bowl of gelatin and stir until blended then blend that into the rest of the topping. Set aside.
- Putting It All Together:
- At this point both the filling and topping are cultured and all the ingredients have been added for both. Placing them in the refrigerator at this point will produce thickened filling and topping – it will set the gelatin. Both the filling and topping can be made up to a week in advance and stored in the refrigerator for optimal flavor and sour taste as long as they are made without the gelatin. The gelatin can be added just before assembling.
- Prepare a sheet pan with 14 silicon regular muffin cups (alternatively paper cups can be used in a muffin tin). Using a 3 tbsp scoop, scoop 3 tbsp filling into each muffin cup and then top with 1 tbsp of topping (you will have extra topping, use it to make a sugar-free granola parfait with berries – it’s delicious!) Place the sheet pan in the refrigerator for at least 8 hours for the gelatin the fully set. When you plan to serve them, pop them in the freezer for an hour so they are easier to remove from the silicon or paper. Makes 14 regular muffin-sized cheesecakes or 1-9-inch cheesecake (in a spring-form pan; use all of the filling and 1 cup of the topping). Keep leftovers in a tightly sealed container in the refrigerator for up to 1 week or in the freezer for up to 1 month.
Net Carbs: 5.4g
SugarOH: 13g

Kefir Buttermilk Ice Cream

Ingredients
- 1 cup buttermilk, room temperature
- 1 tbsp gelatin (unflavored)
- ½ cup xylitol
- 2 pinches stevia (or to taste)
- 1 tsp lemon zest
- ¼ tsp salt
- 2 cups cream, cold
- 1 cup milk kefir, cold (unflavored and homemade preferred)
- ¼ cup lemon juice
- 1 tsp vanilla (optional)
- ¼ cup raspberries (optional)
- ¼ cup blueberries (optional)
Instructions
- Sprinkle the gelatin onto ½ cup of the buttermilk in a small bowl. Set aside and allow to hydrate.
- In a small saucepan heat ½ cup of the buttermilk with the xylitol, stevia, lemon zest, and salt over medium-high heat. Continue to heat until all the sweetener has dissolved. Add the hydrated gelatin and continue to heat for until it has dissolved completely. Remove from the heat and allow to cool for 15 minutes.
- To the cooled buttermilk mixture add the remaining cold cream, kefir, lemon juice and vanilla. Pour the mixture into a plastic container, cover with a lid and put it in the refrigerator for at least 4 hours or overnight.
- Place the mixture in an ice cream maker and follow manufacturer directions. Once the ice cream is done serve immediately or pack into a freezer-safe container and place in freezer. The ice cream will keep in the freezer for up to one month. Place frozen ice cream in the refrigerator for 20-30 minutes before serving and use an ice cream scoop that has been dipped in hot water to serve more easily. Makes about 1 quart; 1 serving = ½ cup. Shown served with blueberries and raspberries.
Notes
Net Carbs : 5.5g
SugarOH: 12g
Enter your text here...

Buttermilk Sherbet with Peaches and Rum Caramel

Ingredients
Buttermilk Sorbet
- 2 cups heavy cream
- 2 cups cold buttermilk
- ¼ cup lemon juice
- ⅔ cup xylitol
- 1 pinch pure powdered stevia
- 1 tsp lemon zest
- ¼ tsp salt
- ⅛ tsp xanthan gum
- 1 tsp vanilla
- Rum Caramel
- ½ cup xylitol
- ⅓ cup heavy cream
- 2 tbsp unsalted butter
- ⅛ tsp Kosher salt (up to ¼ tsp)
- ⅛-1/4 tsp xanthan gum
- 2 tsp vanilla
- 1 tbsp dark rum
- 2 peaches, diced
Instructions
- Buttermilk Sherbet
- In a small saucepan heat 1 cup of the cream with the xylitol, stevia, lemon zest, and salt over medium-high heat. Continue to heat until all the sweetener has dissolved. Sprinkle on the xanthan gum whisking until slightly thickened then remove from the heat and allow to cool for 15 minutes.
- To the cooled cream mixture add the remaining cold cream, buttermilk, lemon juice and vanilla. Pour the mixture into a plastic container, cover with a lid and put it in the refrigerator for at least 4 hours or overnight.
- Place the mixture in an ice cream maker and follow manufacturer directions. Once the sherbet is done serve immediately or pack into a freezer-safe container and place in freezer. This sherbet will keep in the freezer for up to one month. Place frozen sherbet in the refrigerator for 20-30 minutes before serving and use an ice cream scoop that has been dipped in hot water to serve more easily. Makes about 1 quart; 1 serving = ½ cup.
- Rum Caramel
- Place xylitol in a heavy sauce pan over medium high heat until it liquefies. Continue to heat for 3-5 minutes or until the mixture reaches 390°F; using a kitchen thermometer. Note: the mixture may smoke but will not change color, this is normal, do not remove it from the heat.
- While the xylitol is cooking, in a small sauce pan heat the cream until bubbles just begin to form on the outer edges of the pan. Keep warm over low heat until ready to use. (Can also simply be heated in the microwave for about 1 min till it begins to bubble on the edges.)
- Once the xylitol has reached 390°F, remove the pan from the heat and add the hot cream (stand back as it may sputter). Whisk in the butter and salt (more may be added depending upon level of saltiness desired) until fully incorporated.
- Sprinkle the xanthan gum over the mixture and add the vanilla and rum; whisk until smooth and thickened. Serve immediately or store in the refrigerator for up to 2 weeks in a tightly sealed container. Gently rewarm in the microwave or on low in a sauce pan. Makes ¾ cup. 1 tbsp per serving.
- Putting it all together: Serve the ice cream with ⅛th of the diced peaches and 1 tbsp warm caramel - ENJOY!
Notes
Net Carbs : 7.9g
SugarOH: 16g
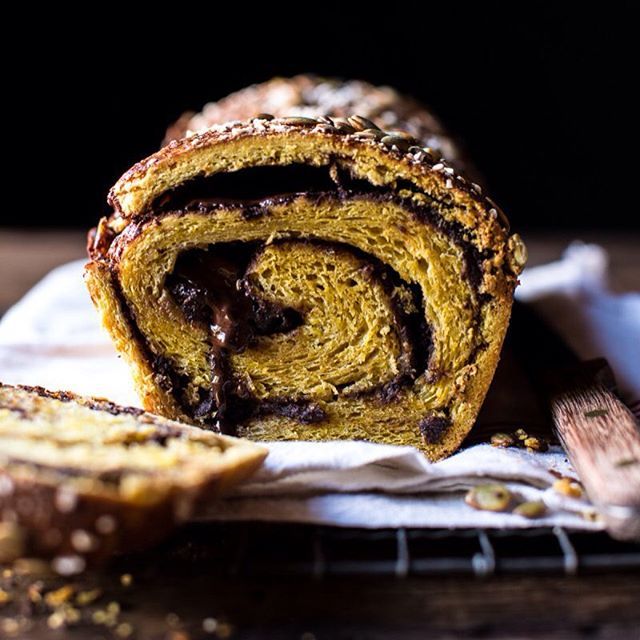
Citrus Zucchini Bread

Ingredients
- ½ cup toasted unsweetened shredded coconut
- 1 ½ cups finely shredded zucchini (yellow squash!)
- 1 tsp lemon juice
- 1 Tbsp lemon zest
- 1 Tbsp vanilla
- 1 ½ cups almond flour
- ¼ cup chia seed flour
- 2 tbsp coconut flour
- 2 tsp cinnamon
- 1 tsp cardamom
- ½ tsp nutmeg
- 1 ½ tsp baking powder
- ½ tsp salt
- Pinch pure powdered stevia
- 4 large eggs
- ¼ cup coconut oil, melted
- ⅓ cup erythritol
- ⅓ cup xylitol
Instructions
- Preheat oven to 350°F. Toast coconut for 5-8 minutes until light golden and set aside to cool. Increase oven temperature to 375°F. Prepare a 5x7-inch loaf pan by placing a piece of parchment on the bottom and spraying it and the sides with oil.
- Grate the zucchini and squeeze out as much water as possible then place it in a small bowl with the lemon juice, lemon zest and vanilla. Set aside.
- In a small bowl whisk to combine the almond flour, chia seed flour, cinnamon, cardamom, nutmeg, baking soda, salt and stevia. Set aside. In a medium bowl, whisk together the eggs, coconut oil, erythritol, and xylitol. Add the flour mixture and blend into a smooth batter. Then add the zucchini mixture blending to combine. Fold in the chopped pecans.
- Bake for 20 minutes at 375°F then turn the oven down to 350°F and continue to bake another 30-35 minutes until light golden brown and set in the center. If the bread begins to brown too much on top cover it with aluminum foil and continue baking. Remove from oven and allow the bread to cool in the pan for 10 minutes before removing to a cooling rack. Enjoy immediately or refrigerate for up to 1 week or freeze tightly wrapped for up to 3 months. Serve at room temperature or toasted.
- Optional: Add 6 drops of certified pure lemon essential oil and 7 drops of certified pure grapefruit essential oils to the batter. ALSO this bread is delicious served with a cream glaze made with 3 Tbsp erythritol (powdered), 2 Tbsp heavy cream and ½ tsp vanilla. Add additional essential oils as described above to your taste and then whisk until fully combined. Drizzle over bread and serve!
Net Carbs : 2.8g
SugarOH: 9.1g
Raspberry Cheesecake Brownies

Ingredients
Cream Cheese Batter
- 12 oz cream cheese, softened
- 3 tbsp erythritol
- 2 tbsp xylitol
- Pinch pure powdered stevia
- 1 large egg
- 1 ½ tsp vanilla
- ¾ tsp almond extract
- 1 cup raspberries
Chocolate Batter
- 8 oz sugar-free chocolate, chopped
- ½ cup unsalted butter
- 1 tsp vanilla
- Pinch of salt
- 3 large eggs
- 2 tbsp xylitol
- 1 pinch pure stevia
- 1 tsp unsweetened cocoa powder for dusting
Instructions
- Preheat oven to 300°F. Grease a 9x9-inch square pan and cover the bottom and sides with a single piece of aluminum foil. Spray with oil and set aside.
- In a small bowl, with an electric mixer and paddle attachment, blend together the softened cream cheese, erythritol, xylitol, and stevia smooth. Add egg, vanilla and almond extract until fully incorporated. Place ⅓ of the cream cheese mixture into another bowl and add the raspberries, blending until combined. Set both bowls aside.
- Melt the chocolate and butter in a microwave safe bowl for 30 second intervals, stirring in between until melted, do not overheat. Blend butter and chocolate until butter is fully incorporated, add vanilla and salt; blend then set aside.
- In a medium bowl, with an electric mixer and whip attachment, whip the eggs, xylitol and stevia until pale yellow and thick; about 3 minutes. Add the melted chocolate mixture and blend 30 seconds until fully incorporated into a thick brownie batter.
- Pour two thirds of the brownie batter into the pan, smoothing it out to cover the bottom of the pan in an even layer. Take spoonfuls of each cream cheese mixture and alternate them over the layer of brownie batter in the pan with spoonfuls of the remaining brownie batter. Use a knife to gently swirl the batters together then rap the pan on the counter to remove any air bubbles and settle the batter.
- Bake for 45 minutes or until set in the center. Cool on a rack in the pan for at least 1 hour up to 1 ½ hours. Once cooled, carefully removed the sides, invert onto a plate, dust the bottom with 1 tsp of cocoa powder to prevent sticking and invert again onto a serving plate. Enjoy immediately or place in the refrigerator for up to 4 days tightly wrapped – bring to room temperature before serving. It may also be frozen, tightly wrapped, for up to 1 month. Bring to room temperature before serving. Cut into twelve 1 ½ x 1 ½ inch brownies.
Net Carbs: 2.8g
SugarOH: 16.3g

Sugar-Free Love Cookies

Ingredients
- ¼ cup unsalted butter
- ¼ cup palm shortening
- ⅓ cup erythritol
- 2 Tbsp xylitol
- 1 pinch pure powdered stevia
- 1 egg
- 1 tsp vanilla
- 1 tsp lemon zest
- 2 cups almond flour
- 1 cup pecan or walnut flour
- 2 Tbsp coconut flour
- ¼ tsp baking soda
- ¼ tsp salt
- 1 ½ tsp cinnamon
- ¾ tsp ginger
- ½ tsp instant coffee
- ⅓ tsp nutmeg
- 15 red or pink colored sugar-free hard candies
Instructions
- In a stand mixer, cream together the butter, shortening, erythritol, xylitol, and stevia until light and fluffy; about 2 minutes.
- Add the egg and blend until fully incorporated. Add the vanilla and lemon zest; blend to combine.
- To a small bowl add the almond flour, pecan flour, coconut flour, baking soda, salt, and spices; whisk to combine.
- Add the flour mixture to the creamed butter and eggs. Beat until incorporated; about 30 seconds.
- Wrap the dough in plastic wrap and refrigerate for 30 minutes. Roll out between parchment or wax paper to about ¼-inch thickness and use cookie cutters that are about 2-3 inches in diameter of your choice. Cut out the center with a smaller cookie cutter and add scraps to the dough to be rolled out or leave and bake as smaller cookies. While cookies are chilling, put the candies into a plastic bag and use a rolling pin to crush them. If using different colors/flavors of candy do each separately. You will need about ⅓ of a piece of candy to fill the cutouts of each cookie.
- Preheat oven to 350°F. Line a sheet pan with parchment paper or use a silicon mat. Place cutout cookies about 1 inch apart and bake for 5 minutes, remove from oven and add crushed candy to cutout centers, put back in the oven and cook another 5-8 minutes until the candy has melted and the cookies are just beginning to brown on the edges. When done allow them to sit on the cookie sheet for 5-10 minutes to allow the candy to harden then transfer to a wire rack to cool completely. Store in an airtight container in the refrigerator. Makes about forty-four 2-inch cookies. 1 cookie is one serving.

Coconut Yogurt

Ingredients
- 2 x 13.5 oz cans unsweetened coconut milk or coconut cream
- 1 tbsp unsweetened dry gelatin
- 1 tsp sugar
- 1 probiotic cap, non-dairy starter culture or previously made coconut yogurt (1/4 cup)
- 3 oz unsweetened protein powder (whey or pea protein)
Instructions
- Bloom gelatin in ½ cup coconut milk (room temperature) by sprinkling it over the milk and allowing it to sit for 5-10 minutes then stir to distribute gelatin.
- Heat remaining coconut milk and sugar (don’t worry, it will be consumed by the probiotics) in a sauce pan to 150°F. Whisk in bloomed gelatin and allow mixture to cool to 110°F. Whisk in starter and protein powder.
- Once temperature reads 110°F, pour into yogurt maker. Allow to process undisturbed for 12-24 hours. Refrigerate for up to one week. Makes 4 cups; ½ cup per serving.
Notes
Net Carbs : 3.5g
SugarOH: 0g
NOTE that you do not have to add the gelatin, sugar or protein powder. The gelatin is added to thicken it. The sugar will feed some of the bacteria as there isn't a lot of carbohydrates in the coconut milk but it really isn't necessary. The protein powder will thicken it slightly as well as provide additional protein to the yogurt so it is more like a Greek yogurt.
